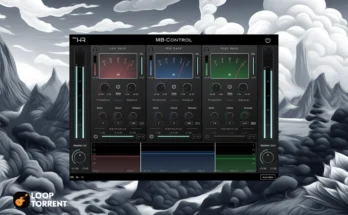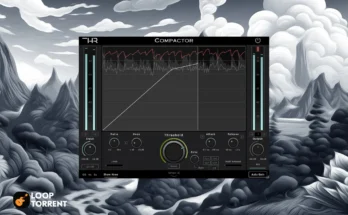
Over 230 plugins from Waves. Create with complete freedom: everything is always at your fingertips.
Let nothing stand between the sound you hear in your head and what comes out of the speakers.
With Waves, the largest option in our Waves Creative Access subscription, you get all the plugins you need, when you need them.
✔️ Extras. information:
This distribution was created from Waves Complete and Waves Ultimate distributions.
Many thanks to Gidrokuritsa for posting the plugin packages.
Contents
All popular Waves vocal plugins. All analog models, from Abbey Road to SSL. All Waves mastering plugins.
All the compressors, all the EQs, all the effects, instruments, saturation plugins, artist signature plugins, channel strips, AI noise reduction… just everything.
Waves offers the most comprehensive set of professional quality audio plugins.
✔️ Features of the distribution
This distribution presents 2 ways to install Waves plugins:
FULL (full installation)
Installing ALL plugins of one or more selected types (AAX, VST, VST3).
SELECT (custom installation)
Install selected plugins through Waves Central, but all 3 types (AAX, VST, VST3).
Samples Library
For those especially lazy who don’t want to register on Waves.com and download sample libraries from there).
Here are the libraries for all Waves virtual instruments for a full installation (FULL).
With a custom installation, sample libraries are loaded along with the selected instrument.
Designations in library names:
SD – Standard Definition
HD – High Definition
HD libraries differ from SD libraries in quality and larger size.
✔️ Important notes
1. You can install either the FULL or SELECT version, they do not work together!
2. STANDALONE virtual instruments in the FULL version do not work without VST3 plugins installed! (an error window will appear).
Those. If you are going to use STANDALONE instruments, your choice is to install VST3 plugins.
3. When you use the Cleanup function in Waves Central Settings, it restarts.
It is IMPORTANT to close this re-opened window!
If you need to continue installing plugins after this, run the ‘Call Waves Central.cmd’ file again. When using the
Uninstall function in Waves Central Settings,
after uninstalling the plugins, just go to the Install Products tab
and continue selecting and installing plugins.
4. Since in the SELECT version everything is automated whenever possible, it is very important to follow the procedure described in the instructions
‘Initial installation.txt’ and ‘Additional installation of plugins.txt’.
✔️ Installation
☑ Installation Waves FULL
1. Download ‘Waves MAIN.7z’ and unpack
2. Download archives of the required types of plugins (AAX.7z, VST.7z, VST3.7z) and unpack
3. Merge folders (example)
4. Move the ‘Waves’ folder to the desired drive (for example, where all NO INSTALLs are located)
5. Run the file ‘Existing Folders.cmd’
6. Open the file ‘Existing Folders.txt’. If folders and files exist, delete them!
7. Run all the files ‘SymLink <type> Installer.cmd’ one by one
8. Launch the DAW, all downloaded WAVES plugins should not require activation. If the plugin crashes
when loading, reinstall the Microsoft Visual C++ Redistributable Package!
* For those especially gifted)) there is a copy of ‘WavesLicenseEngine.bundle’ in the R2R folder. If SUDDENLY the plugins require
activation, run the file ‘R2R\R2R_Kill_Waves_Background_Process.cmd’, and then copy the ‘WavesLicenseEngine.bundle’
to the folder ‘C:\ProgramData\Waves Audio\Modules’ with replacement.
☑ Installing Waves SELECT
Initial installation of plugins
If the WAVES plugins have not been installed before:
1. Download ‘Waves SELECT.7z’ and unpack
2. Move the ‘Waves’ folder to the desired disk (for example, where all NO INSTALL are located)
3. Run the file ‘Existing Folders.cmd’
4. Open the file ‘Existing Folders.txt’. If folders and files exist, delete them!
5. Run the file ‘SymLink Installer.cmd’ (this will create the necessary links for subsequent installation).
6. If you have already registered on ‘https://www.waves.com’, you can skip this step.
Otherwise, go to ‘https://www.waves.com’ and register.
7. IMPORTANT! If Waves Central starts after registering on the site, close it!
8. Run ‘Call Waves Central.cmd’. Select and install the required plugins.
9. IMPORTANT! View and record the device ID (in Waves Central, ‘License’ tab on the left).
10. IMPORTANT! Close Waves Central, this will complete the plugin installation.
11. Run the ‘Make a license.cmd’ file, enter the user name in the ‘Device Name’ field and the device ID number
in the ‘Device ID’ field. Click ‘GENERATE’ and select either the Desktop or
‘C:\ProgramData\Waves Audio\Licenses’ folder for the license file.
12. IMPORTANT! Close the keygen, and a copy of the license will be saved for future installations
13. Launch the DAW, all downloaded WAVES plugins should not require activation. If the plugin crashes
when loading, reinstall the Microsoft Visual C++ Redistributable Package!
✔️ Additional installation of plugins
If some WAVES plugins have already been installed:
1. Run the file ‘Call Waves Central.cmd’
2. Select and install the required plugins.
3. IMPORTANT! Close Waves Central, this will complete the plugin installation.
There is no need to run the ‘Make a license.cmd’ file, everything will be corrected automatically after closing Waves Central
4. Launch the DAW and check for plugins
✔️ How to connect sample libraries
1. Download sample archives for the desired instruments and unpack
2. Move the folders with samples to the desired disk
3. Launch the desired instrument in DAW or STANDALONE
4. Specify the location of the sample library for this tool.
For all instruments except COSMOS, the path to samples is specified as follows
For COSMOS, the path to the samples is indicated as follows:

![Waves Waves Complete / Ultimate [02/11/2024 / 01/24/2024] (NO INSTALL, SymLink Installer) SAL, VST, VST3, AAX x64 [WIN] Waves Waves Complete / Ultimate [02/11/2024 / 01/24/2024] (NO INSTALL, SymLink Installer) SAL, VST, VST3, AAX x64 [WIN]](https://positiverecords.ru/pages/vst/effects/images8/e2515_7.jpg)
![Waves Waves Complete / Ultimate [02/11/2024 / 01/24/2024] (NO INSTALL, SymLink Installer) SAL, VST, VST3, AAX x64 [WIN] Waves Waves Complete / Ultimate [02/11/2024 / 01/24/2024] (NO INSTALL, SymLink Installer) SAL, VST, VST3, AAX x64 [WIN]](https://positiverecords.ru/pages/vst/effects/images8/e2515_8.jpg)
![Waves Waves Complete / Ultimate [02/11/2024 / 01/24/2024] (NO INSTALL, SymLink Installer) SAL, VST, VST3, AAX x64 [WIN] Waves Waves Complete / Ultimate [02/11/2024 / 01/24/2024] (NO INSTALL, SymLink Installer) SAL, VST, VST3, AAX x64 [WIN]](https://positiverecords.ru/pages/vst/effects/images8/e2515_9.jpg)
![Waves Waves Complete / Ultimate [02/11/2024 / 01/24/2024] (NO INSTALL, SymLink Installer) SAL, VST, VST3, AAX x64 [WIN] Waves Waves Complete / Ultimate [02/11/2024 / 01/24/2024] (NO INSTALL, SymLink Installer) SAL, VST, VST3, AAX x64 [WIN]](https://positiverecords.ru/pages/vst/effects/images8/e2515_10.jpg)
![Waves Waves Complete / Ultimate [02/11/2024 / 01/24/2024] (NO INSTALL, SymLink Installer) SAL, VST, VST3, AAX x64 [WIN] Waves Waves Complete / Ultimate [02/11/2024 / 01/24/2024] (NO INSTALL, SymLink Installer) SAL, VST, VST3, AAX x64 [WIN]](https://positiverecords.ru/pages/vst/effects/images8/e2515_11.jpg)
![Waves Waves Complete / Ultimate [02/11/2024 / 01/24/2024] (NO INSTALL, SymLink Installer) SAL, VST, VST3, AAX x64 [WIN] Waves Waves Complete / Ultimate [02/11/2024 / 01/24/2024] (NO INSTALL, SymLink Installer) SAL, VST, VST3, AAX x64 [WIN]](https://positiverecords.ru/pages/vst/effects/images8/e2515_12.jpg)


